Frequently Asked Questions
Can Google Ads send leads to Salesforce natively?
Only via webhook: Google Ads lead form assets can POST submissions to a webhook URL, which your team has to build, host, and maintain, including the Salesforce API integration behind it. LeadSync replaces that entire stack with a no-code connection.
Which Salesforce editions work with LeadSync?
Any edition with REST API access: Enterprise, Unlimited, and Developer. Professional and Starter Suite orgs need an API add-on from Salesforce. LeadSync shows a warning at connect time if your edition does not include API access.
Does LeadSync create Leads or Contacts in Salesforce?
Leads. Each form submission becomes a new Lead record, so your assignment rules, workflows, and lead processes all fire exactly as they would for any other new lead.
Do my Salesforce assignment rules still run?
Yes. LeadSync creates each Lead with auto-assignment enabled, so your active assignment rule routes the new lead to the right owner within seconds of the form submission.
What happens with duplicate leads?
LeadSync respects your org’s duplicate rules as configured. Rules that allow with an alert save the lead and record the alert; rules that block duplicates block the save, exactly as for manual entry.
What if my lead form doesn’t ask for a company?
Salesforce requires a Company on every Lead. When your Google lead form does not capture one, LeadSync fills it with the lead’s name so the record is always created. No lead fails over a missing required field.
How fast do leads reach Salesforce?
In real time, typically under 60 seconds from form submission. Manual CSV workflows measure the same journey in hours or days.
Quick Start Summary
LeadSync sends your Google Ads lead form submissions into Salesforce as Lead records in real time. Connect your Google Ads account and Salesforce to LeadSync (both one-click OAuth), pick the lead form asset you want to sync, map your form fields to Salesforce Lead fields, and send a test lead. Every Google Ads lead then lands in Salesforce within seconds, routed by your assignment rules. About five minutes of setup, no webhooks, no code.
Why send Google Ads leads to Salesforce with LeadSync?
Google Ads lead form assets (formerly Lead Form Extensions) capture prospects at the moment of highest intent: mid-search. Getting those leads into Salesforce is where it gets clumsy.
No more webhook plumbing. Google’s supported integration path is a webhook: your team builds an endpoint, hosts it, parses Google’s payload, and writes the Salesforce API calls. It works, until the schema changes or the person who built it leaves. LeadSync replaces all of it with an OAuth connection.
Speed. The alternative to a webhook is downloading CSVs from Google Ads, and Google only retains lead data for 30 days. LeadSync receives each submission in near real time and creates the Salesforce Lead within seconds, while the prospect’s search intent is still hot. Speed-to-lead research says leads contacted within 5 minutes are 21x more likely to qualify.
Complete data and routing. Every form question, including custom qualifying questions, maps to any standard or custom Lead field. Leads are created with auto-assignment enabled, so your Salesforce assignment rules route them instantly.
Prerequisites
- An active LeadSync account (start with a 7-day free trial)
- A Salesforce org with REST API access: Enterprise, Unlimited, or Developer edition. Professional and Starter Suite need an API add-on from Salesforce.
- A Google Ads account with an active lead form asset on a Search or Display campaign
Step 1: Connect your Google Ads account
- In LeadSync, go to Ad Accounts and click Add Google Account.
- Sign in to your Google account and authorize LeadSync to access your ad accounts.
- Select the Google Ads account containing your lead form.
Make sure the Google account you authorize has access to the ad account running your lead forms.
Step 2: Connect Salesforce to LeadSync
- Go to Connections and click Add Connection.
- Choose Salesforce from the connection dropdown.
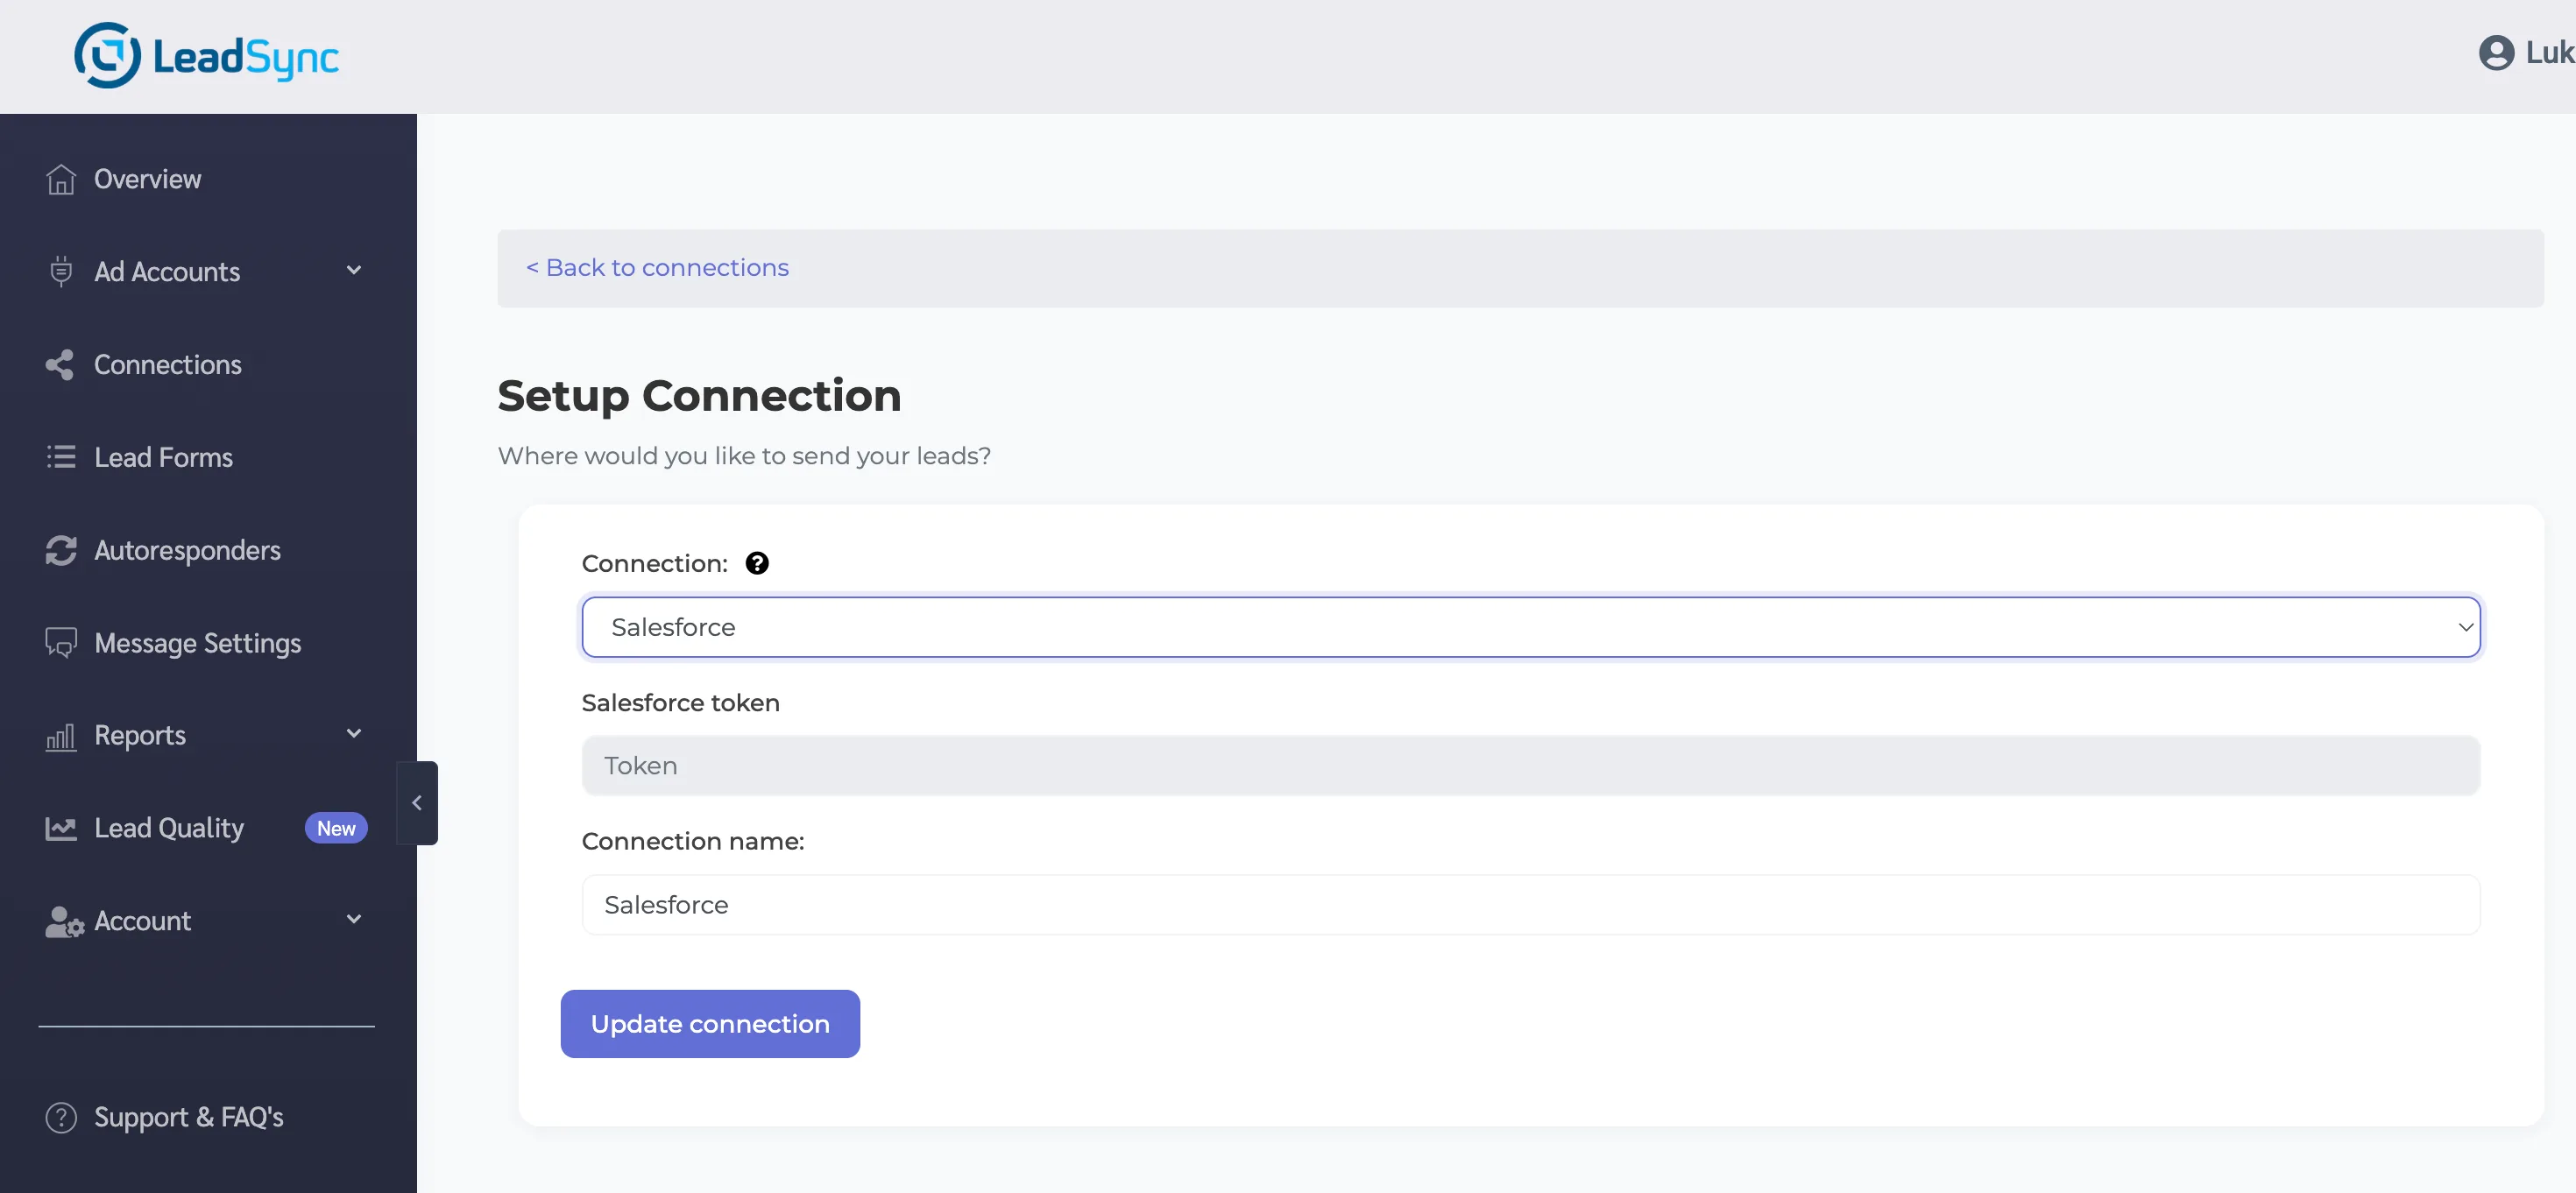
- LeadSync redirects you to Salesforce to authorise the connection. Log in to your org and review the access screen.
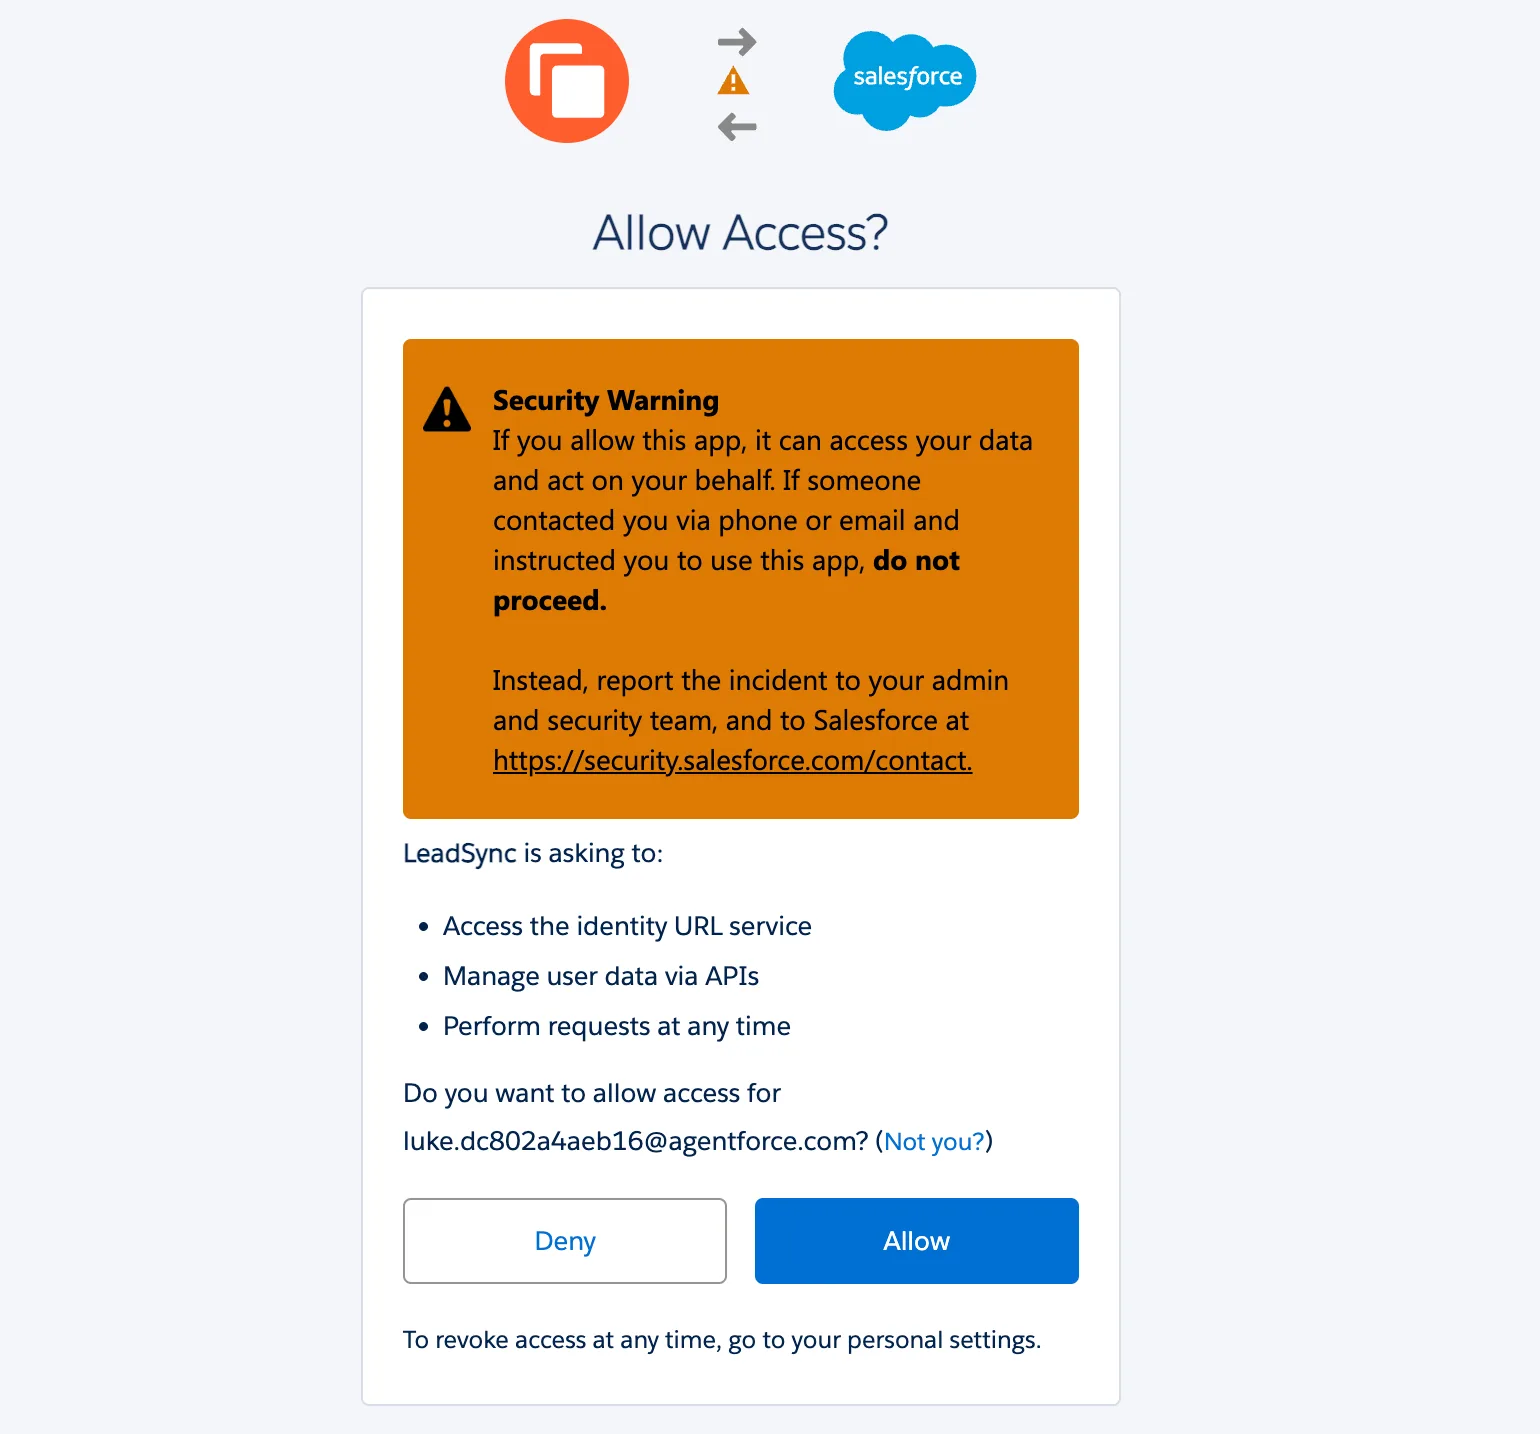
- Click Allow. Back in LeadSync, name the connection and click Update connection.
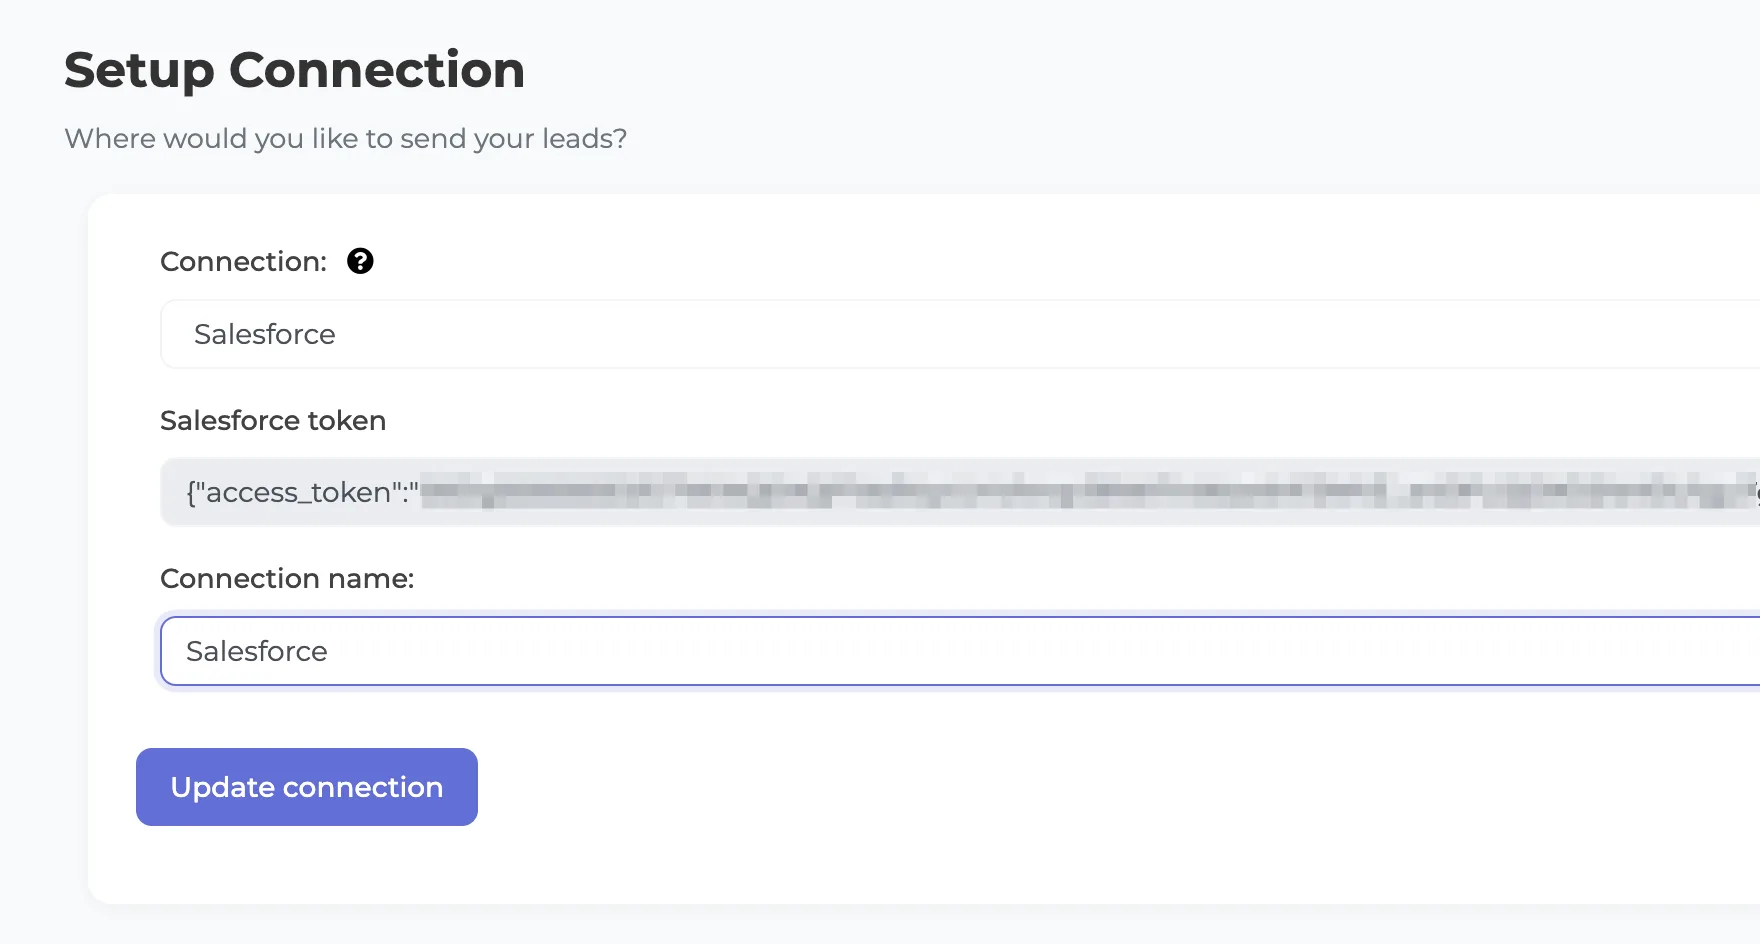
LeadSync refreshes its access token automatically from here on, so this is a one-time step.
Step 3: Pair your lead form and map the fields
- Click Lead Forms, then Add Google Lead Form.
- Select your Google Ads account, the lead form asset used in your campaign, and your Salesforce connection.
- Map each form question to a Salesforce Lead field in the mapping table. The field list is pulled live from your org, custom fields included.
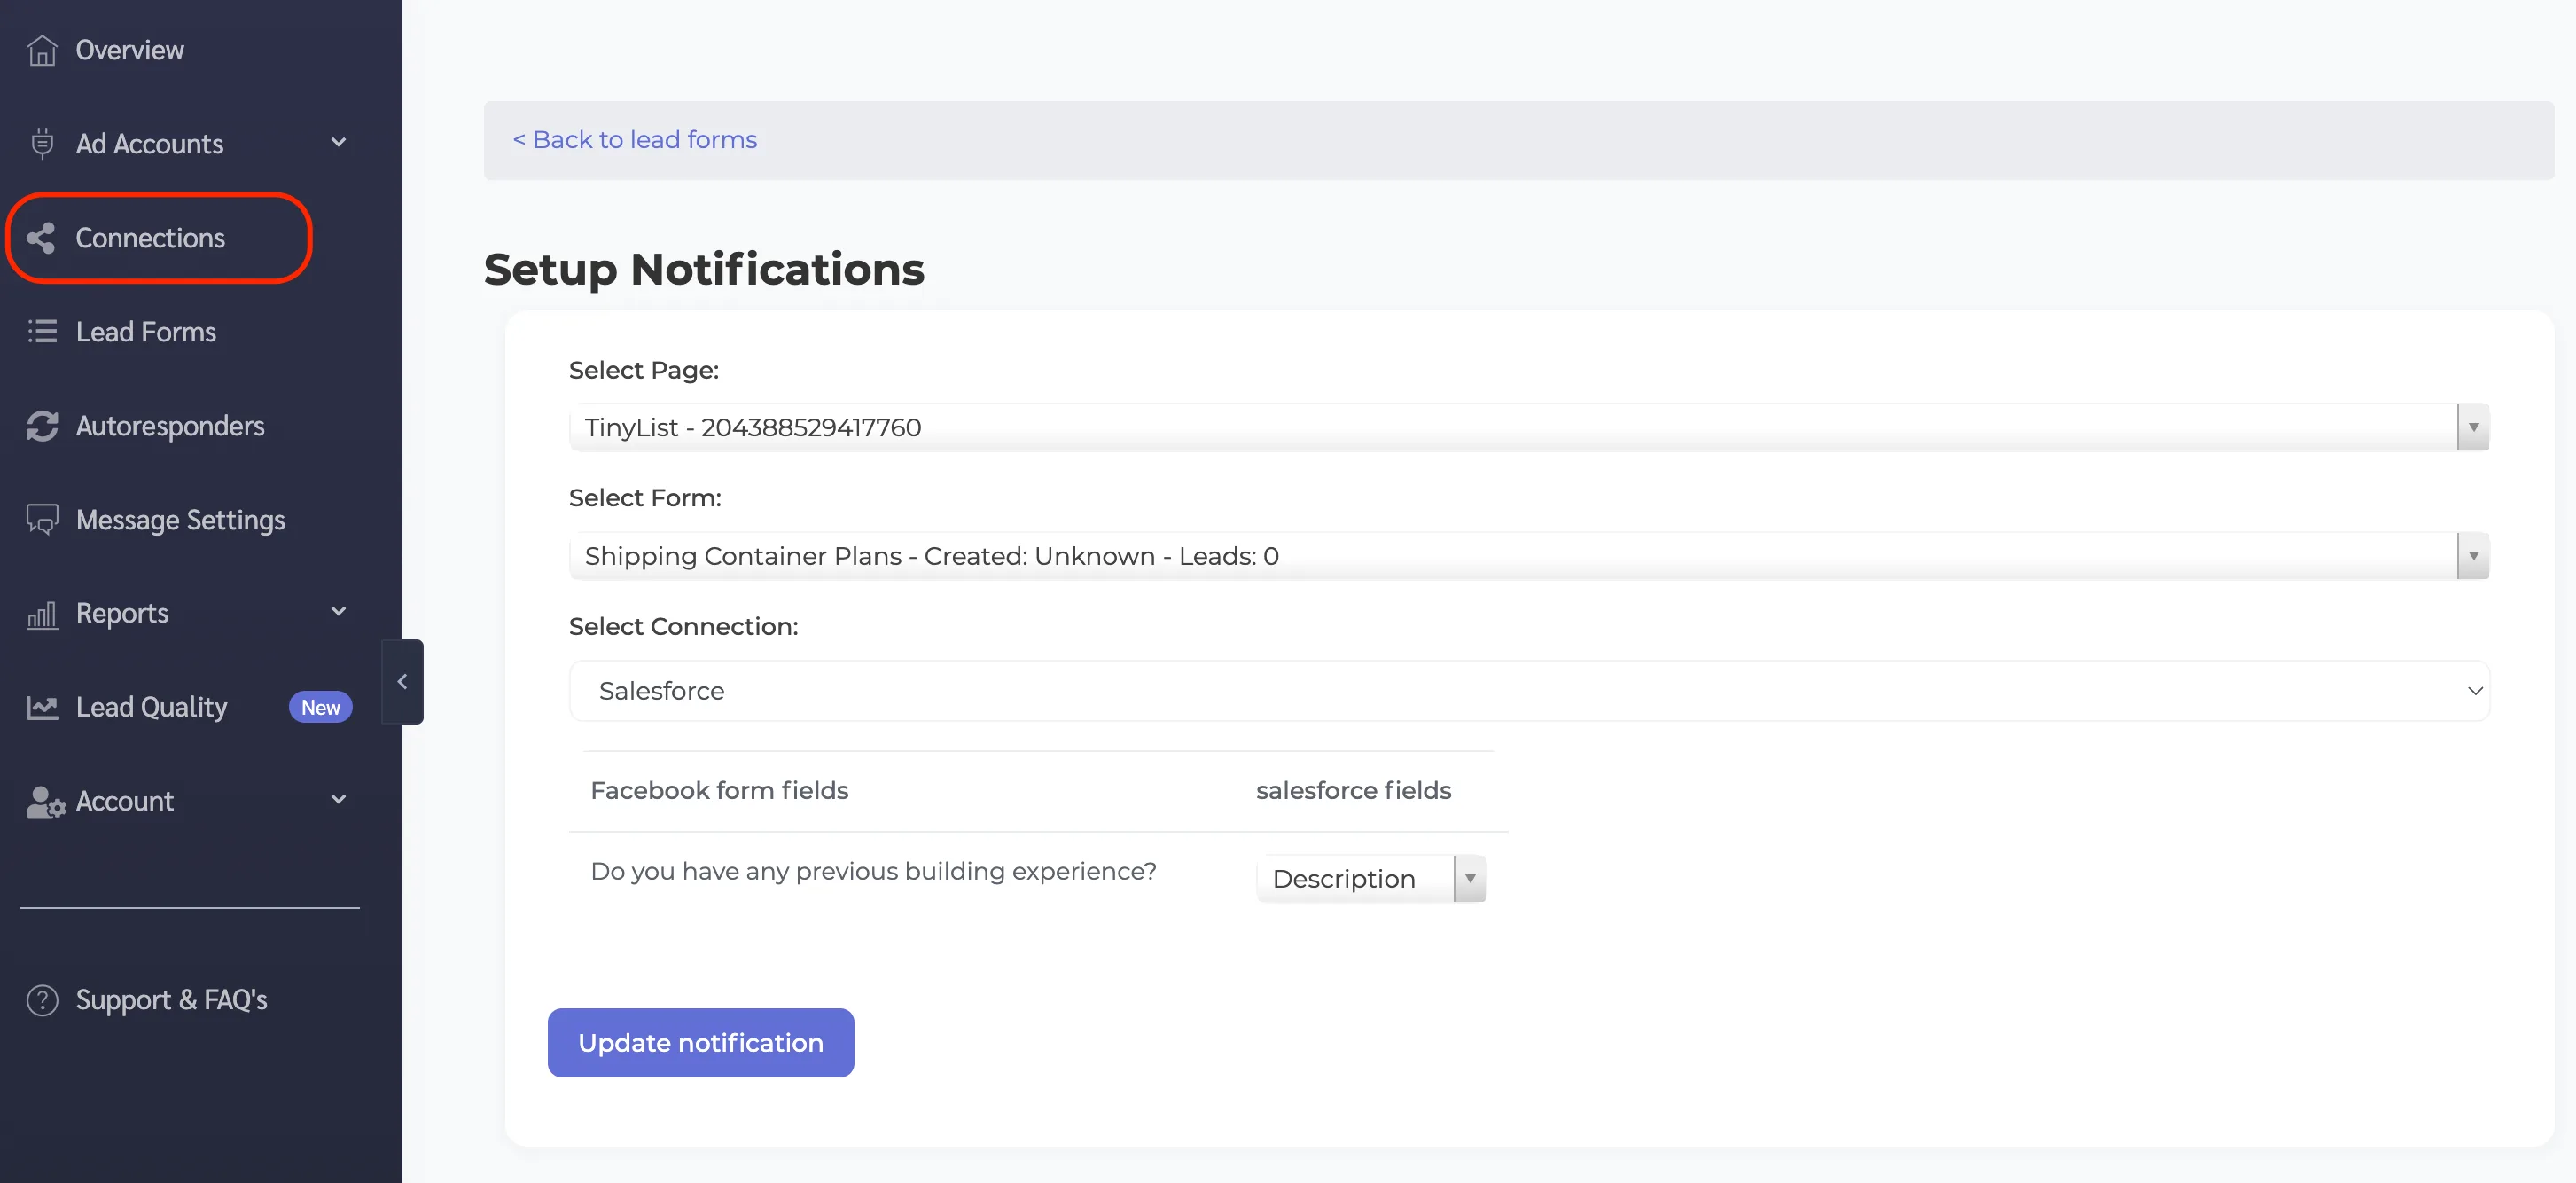
Google can pre-fill name, email, and phone from the user’s Google account, so those fields arrive reliably. And because Salesforce requires a Company on every Lead, LeadSync fills it with the lead’s name when your form doesn’t ask for one.
Step 4: Send a test lead
- Save your form connection.
- Submit a test lead by previewing your ad and completing the form.
- Open Leads in Salesforce. Your test lead appears within seconds with mapped fields filled in.
If the list looks empty, switch from “Recently Viewed” to “All Open Leads”.
Assignment rules and duplicates: what happens on arrival
Assignment rules fire. Each Lead is created with auto-assignment enabled, so your active rule routes it to a rep, queue, or territory immediately. Pair the rule with an email alert and your rep is notified seconds after the search click became a lead.
Duplicate rules are respected. Repeat submissions behave exactly as your admin configured: allowed with an alert, or blocked. LeadSync never forces records past your org’s rules.
Troubleshooting
- Connection warning about API access? Your Salesforce edition may not include the REST API; Professional and Starter Suite need Salesforce’s API add-on.
- Lead not appearing? Confirm the lead form asset you paired is the one attached to your live campaign, and check the “All Open Leads” view.
- A repeat test lead didn’t save? That’s your duplicate rule working.
- Still not receiving leads? Work through the troubleshooting guide.
Quick wins after setup
- Add an email alert to your assignment rule so reps hear about search-intent leads immediately
- Map your qualifying questions to custom Lead fields and surface them on the Lead page layout
- Create a “Google Ads” Lead Source report to compare search-sourced pipeline against your other channels
Related integration guides
Running lead ads on more than one platform? LeadSync routes them all into Salesforce through the same pipe:
- How to send Facebook leads to Salesforce
- How to send LinkedIn leads to Salesforce
- How to send Google Ads leads to Google Sheets
- How to send Google Ads leads to HubSpot
- How to send Google Ads leads to Odoo CRM
Ready to skip the webhook project? Start your free 7-day LeadSync trial.