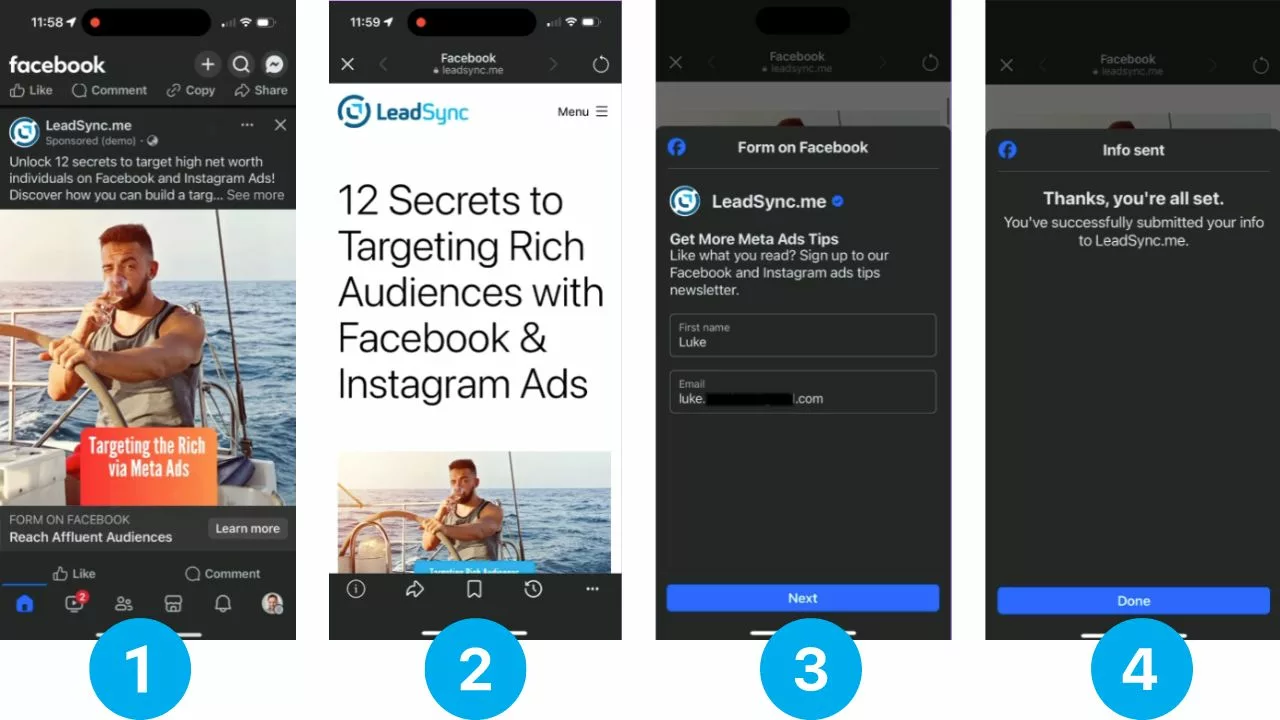
Did you know that you can combine the traffic objective with Meta’s instant forms to generate traffic AND leads via Facebook and Instagram Ads?
If you’re using Meta ads to drive traffic to your website you can also use the Instant Form Browser Add On to show people a lead form once they’ve clicked on your ad. Because people are viewing your content from within the Facebook or Instagram app, Meta are able to trigger their own forms from within this in-app browser.
Sound a little complicated? Let’s take a look at how it works.
How does the Meta Instant Form Browser Add-On Work?
To see how the instant form browser add on works in the news feed, here’s a quick preview.
The browser add-on instant form is triggered only when a person scrolls on your website for the first time. If the person doesn’t interact with the form, it minimizes to the footer, allowing them to return to it later.
How to Building a Traffic + Instant Forms Campaign
Create a new Traffic Objective Campaign

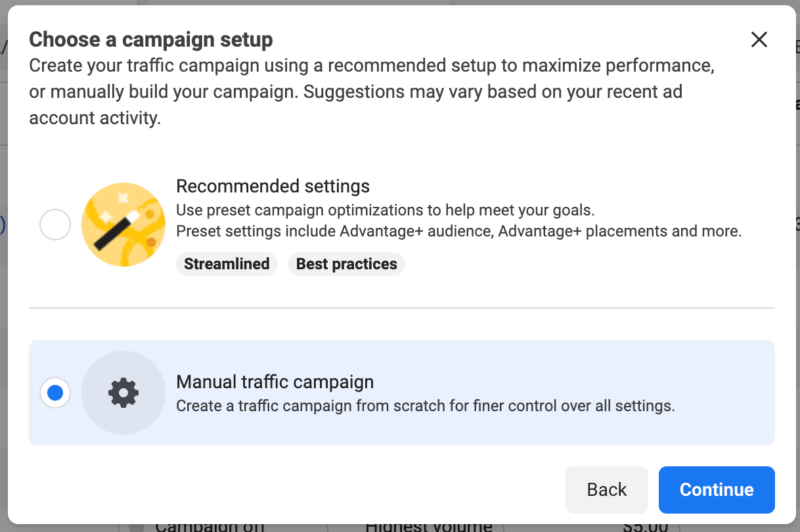
Select the Manual traffic campaign option
Name your campaign

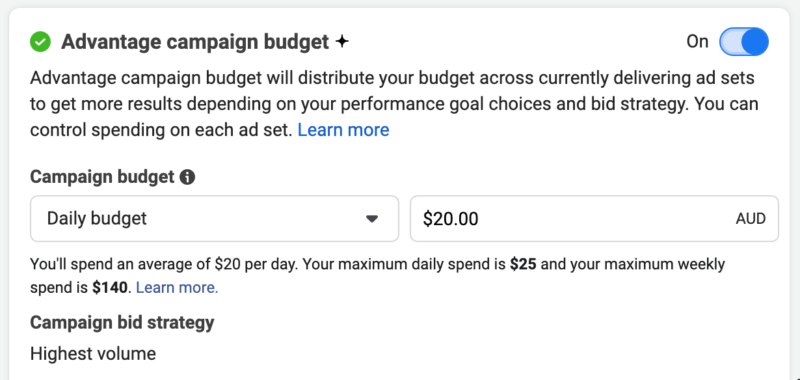
Set your budget
Setting up your Ad Set
Name your Ad Set

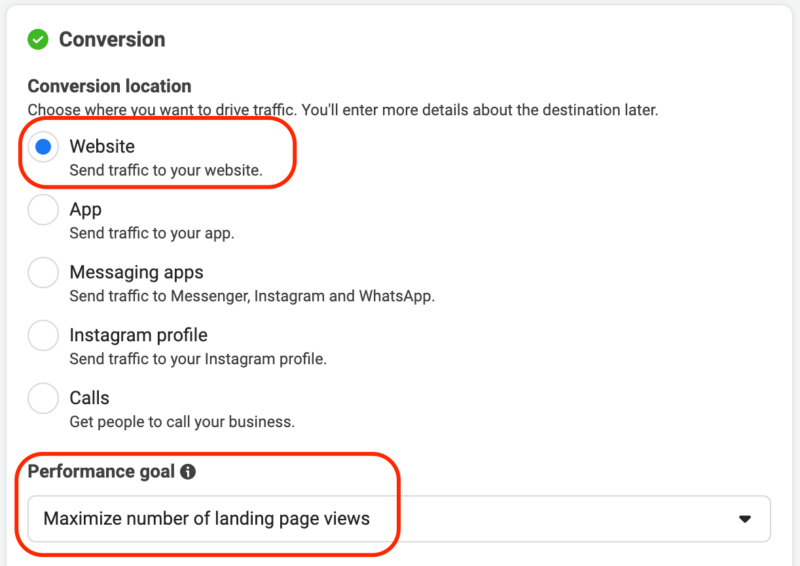
Conversions: Select Website & Maximize number of landing page views
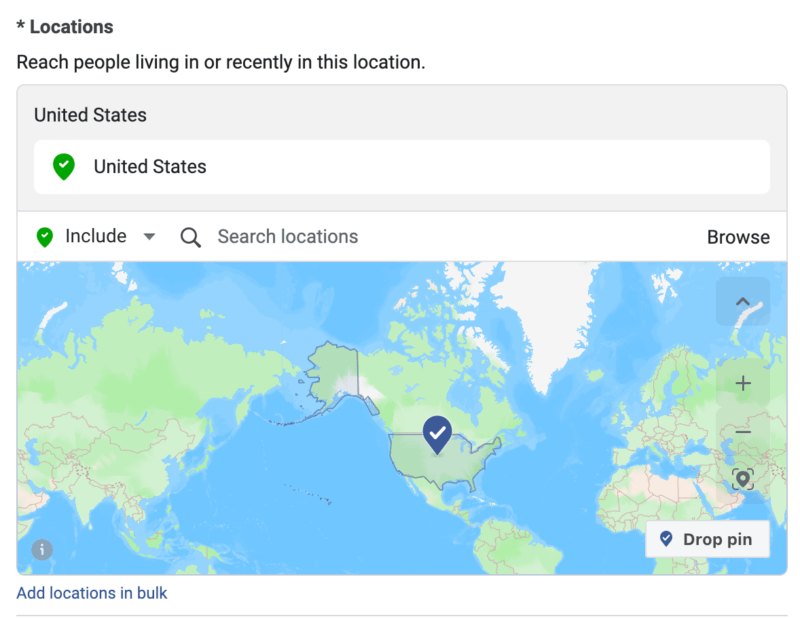
Select your audience location
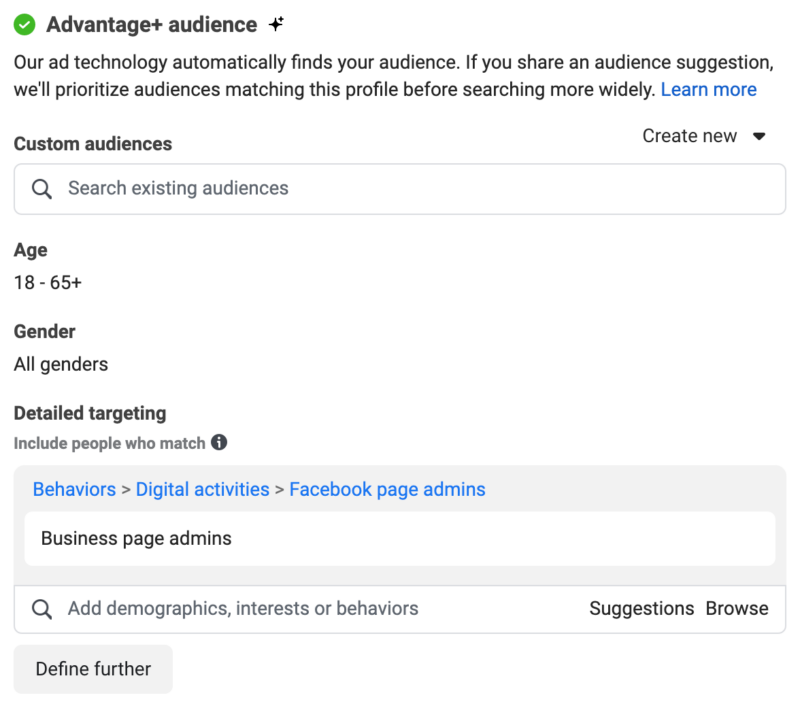
Define your audience demographics, behaviours and interests
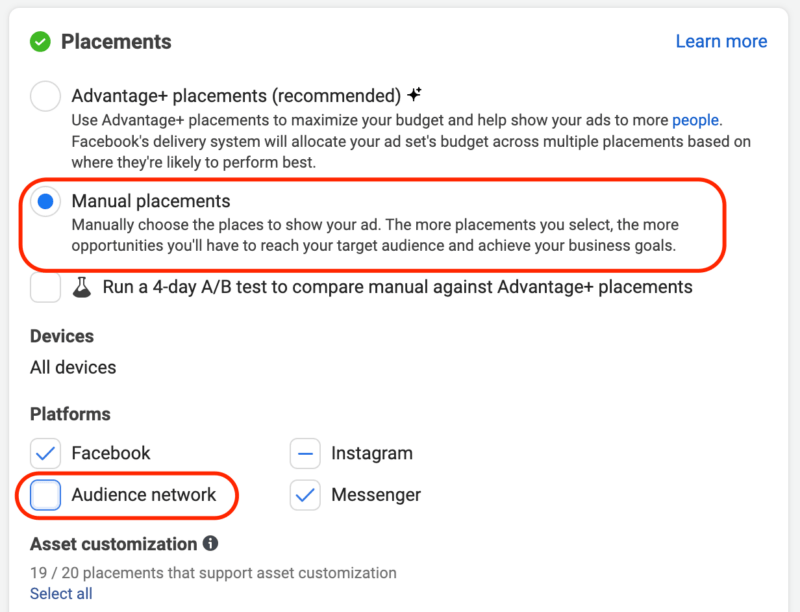
Select your Placements
By default, this is set to Advantage+ placements. Personally I’ve found that this can generate a lot of low quality click from the Audience network, so my preference is to change this to Manual placements and un-check the Audience network option.
Create your Ad
If you’re familiar with Meta ads, you’ll know you have 2 options here. You can either create an ad from scratch, or use an existing post.
To use instant form browser add-ons, you’ll need to create an ad. Unfortunately you can’t (currently) promote a post and use the browser add-ons feature.
In this example, I’ve created an add based on one of our most popular blog posts “How to target high net worth individuals via Meta Ads“.
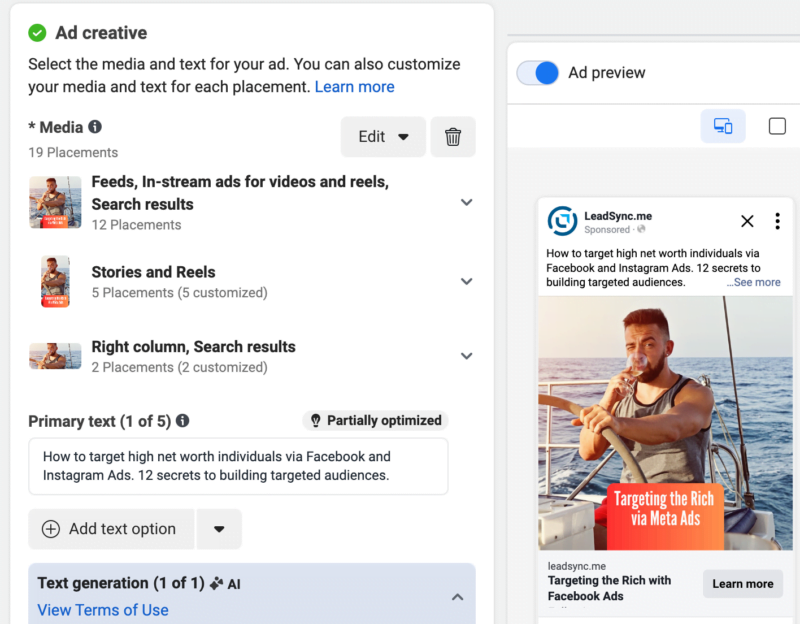
Typically I would create at least 3 variations with 3 different images and/or video to test which one performs best.
Add your Destination URL and Select Instant form
Here’s where you can choose to show an instant form when people click in your ad.
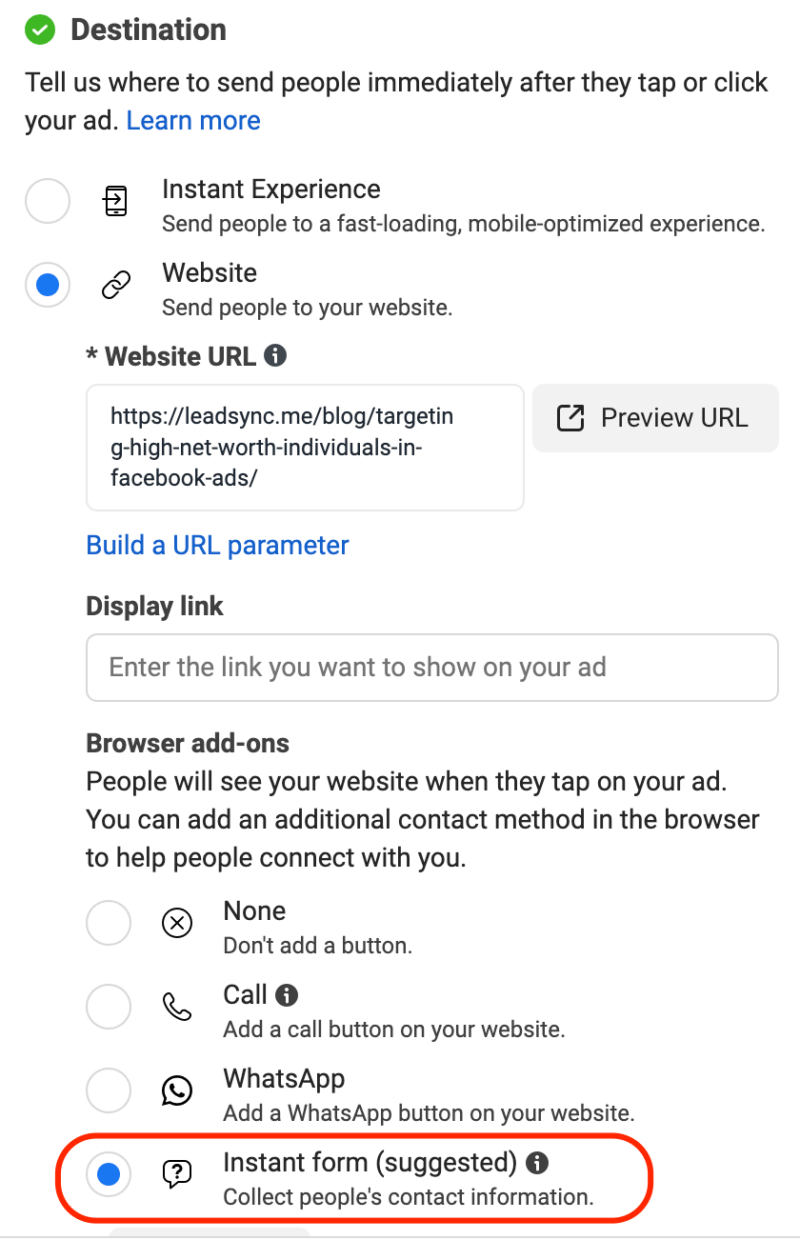
Creating your Instant-Form Browser Add-on

We’ve written extensive guides on creating Facebook lead forms, so please feel free to refer to those. For this browser add-on example, we’re going to create a simple “Sign up to our newsletter” type form, but you could of course create something a little more enticing such as a lead magnet offering.
By default, the form will ask for a Full Name. I prefer to change this to First Name as we’ll be adding leads to our email marketing platform in the next step, and when you email someone, you usually only use their first name.

Link to a Privacy Policy
You’ll need to link to a privacy policy, which most websites, if not all, should have. If you don’t, you can use our Privacy Policy Generator.
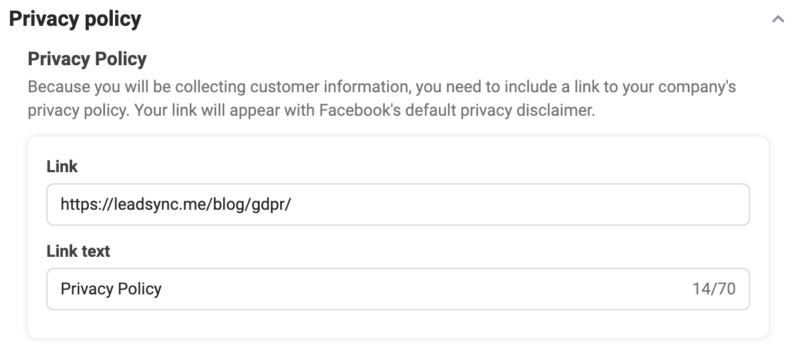
Click the Create form button once you’re done.
Go ahead and Publish Your campaigns.
How to Access Your Instant Form Leads
When it comes to downloading your instant for leads, you have a couple of options.
- Download Leads from Meta Leads Centre
- Add Leads to Google Sheets
- Receive Leads via Email
- Send Leads to your CRM
To learn more, click the option that best suits you.

